OAuth 2.0 pour Microsoft Power BI
Configurez Alteryx One Platform pour l'intégrer à Microsoft Power BI en utilisant OAuth 2.0 pour l'authentification.
Créer l'application cliente OAuth 2.0 dans Azure
Créez l'application cliente dans la console Azure.
Connectez-vous à Azure : https://portal.azure.com/#home.
Sélectionnez Azure Active Directory > Enregistrements d'applications > Nouvel enregistrement.
Indiquez les champs suivants :
Le nom de l'application.
Types de comptes pris en charge. Sélectionnez Locataire unique ou Locataires multiples.
Redirection URI. Spécifiez l'URL au format suivant, en fonction de votre connexion au projet ou à l'espace de travail :
https://<Login_URL>/oauth2/callbackPar exemple
https://us1.alteryxcloud.com/oauth2/callback
Pour créer le nouvel enregistrement, sélectionnez Enregistrer.
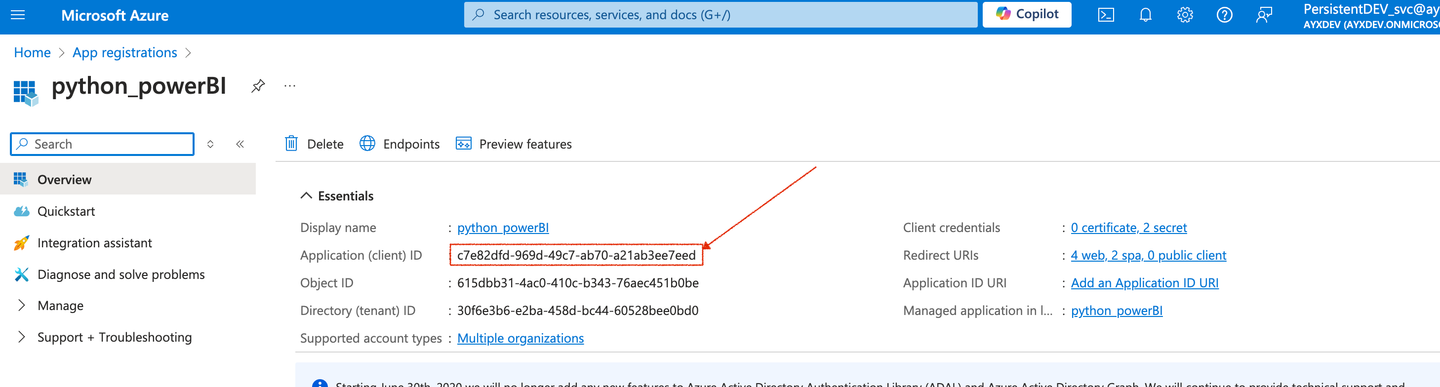
Dans l'onglet Vue d'ensemble, copiez la valeur ID d'application (client). Cette valeur sera appliquée dans Alteryx One.
Pour créer un nouveau secret client, accédez à l'onglet Certificats et secrets, sélectionnez Nouveau secret du client, définissez l'option Expiration sur Jamais, puis sélectionnez Ajouter.
Copiez le champ Valeur. Cette valeur est le secret client et sera appliquée dans Alteryx One.
Dans l'onglet Autorisations API, ajoutez les autorisations pour OpenID ainsi que pour le service Power BI.
Pour OpenID, sélectionnez Ajouter une autorisation - Graphique Microsoft - Autorisations déléguées.
E-mail
openid
offline_access
profil
Et sélectionnez Ajouter des autorisations.
Pour le service Power BI, sélectionnez Ajouter une autorisation - Service Power BI - Autorisations déléguées .
Dans Jeu de données, sélectionnez Dataset.ReadWrite.All
Dans Espace de travail, sélectionnez Workspace.Read.All et Workspace.ReadWrite.All.
Sélectionnez Ajouter les autorisations puis enregistrez.
Vous pouvez utiliser n'importe quel client Power BI déjà configuré dans Azure, si les autorisations nécessaires sont présentes.
Créer le client OAuth 2.0 pour Power BI
Après l'application cliente Power BI, créez un client OAuth 2.0 dans Alteryx One, utilisé pour l'intégration avec l'application Client OAuth 2.0.
Connectez-vous à Alteryx One en tant qu'administrateur de l'espace de travail.
Dans le menu de droite, sélectionnez Menu Utilisateur > Console d'administration > Clients OAuth 2.0.
Sur la page clients OAuth 2.0, sélectionnez Enregistrer le client OAuth 2.0.0.
Choisissez la Power BI dans la liste déroulante.
Saisissez les champs suivants :
Champ
Action
Nom
Ajoutez le nom approprié pour le client.
ID client
Collez la valeur de l'ID d'application (client) généré dans Azure.
Secret du client
Collez la valeur du secret client dans Azure.
URL d'autorisation
Coller cette URL :
https://login.microsoftonline.com/organizations/oauth2/v2.0/authorize
URL du jeton
Coller cette URL :
https://login.microsoftonline.com/organizations/oauth2/v2.0/token
Champs d'application
Saisissez les définitions de portée suivantes :
openid
offline_access
profile
email
https://analysis.windows.net/powerbi/api/Dataset.ReadWrite.All
https://analysis.windows.net/powerbi/api/Workspace.Read.All
Les champs individuels doivent être séparés par un espace.
Le jeton d'accès expire dans
Saisissez 3600000 ms.
Le jeton d'actualisation expire dans
Saisissez 777 600 000 ms.
Sélectionnez Enregistrer.