Build Workflows
A workflow consists of connected tools that perform different functions to process data in Designer Cloud. When you build a workflow, you add and connect tools. You also configure those tools and workflow properties. Workflow connections move in a downstream direction horizontally.
To build a Designer Cloud workflow, select New from the Designer Cloud home page.
Add or Remove Tools
To add a tool to a workflow, select any tool from the tool palette and drag it onto the workflow canvas.
To remove a tool from a workflow, select the tool, and use the Delete key on your keyboard.
Connect Tools
To connect tools in a workflow, drag a tool from the tool palette onto the canvas near the output anchor of another tool. You can also drag the output anchor from an existing tool to the tool you just added.
Note
Some browsers may handle tool alignment differently, making the tools appear misaligned.
Connections go in through the left side of a tool and out through the right side of a tool.
Some tools accept multiple inputs indicated by multiple input anchors.
Some tools have optional inputs indicated by a gray input anchor.
All tools with an output anchor can be output to multiple streams.
Connection Actions
Delete a connection: To delete a connection, select the connection and use the Delete key on your keyboard. Downstream tools are not deleted.
Insert a tool into a connection: Right-click on the connection, then select Insert.
Name a connection: Double-click any connection to add a name or rename the connection.
Canvas Options
Run Job: Runs the workflow. The button changes to Stop while the workflow is running.
The Run Job button is disabled by default and is only enabled when you have a connected Output tool in your workflow.
The workflow is automatically run every time there is a change in your workflow or tool configurations.
Stop: Stops the workflow.
File: The options under File are...
New Workflow (Alt + N): Create a new workflow.
Open (Alt + O): Open a workflow that is saved in Designer Cloud.
Open Recent: Open a workflow you recently accessed.
Save Version: Select to enter a Version Name for your current workflow. You can open saved workflow versions from Version History.
Version History: Open the Version History page. From the Version History page, you can...
Compare changes between 2 versions of a workflow, including who made each change and when.
Restore a previous workflow version or open a previous version as a new workflow.
View the JSON configuration of each version.
Save (Alt + S) and Save As: Save your current workflow to Designer Cloud.
Duplicate: Create a copy of your workflow.
Rename: Change the name of your workflow.
Schedule: Open the New Schedule dialog to schedule your workflow run.
View: The options under View are...
Canvas Grid: Adds a grid to the canvas.
Mini Map: Shows a map of the entire canvas with a highlighted section that shows what is in view. To change your view, select and drag the highlighted section within the Mini Map.
Tool Names & IDs: Turn on or off the tool names and ID numbers under each tool icon.
Suggestions: See suggestions for tools to add to your workflow.
Tool Description Flyouts: When enabled, tool descriptions appear when you hover over a tool in the tool palette or the question mark icon in the tool configuration window.
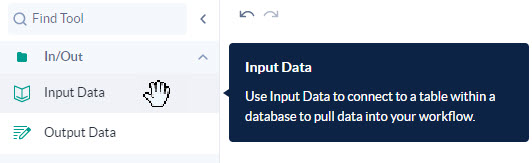
Figure: Tool descriptions appearing in the tool palette flyouts.
Options: Select Options to change...
Workflow Settings: Change the workflow name.
Copy and Paste
To control where an item pastes onto the canvas, select the item, copy it (Ctrl + C), select where you want to paste the item, and then paste it (Ctrl + V). Designer Cloud pastes the item at the same point as the cursor.