Start with a Template
This section describes how to use a provided template to create an end-to-end flow.
Overview
A template is a pre-defined set of guidelines for creating the objects needed for a flow that solves a specific use case. Templates enable you to quickly create a flow by guiding you through the process of importing a dataset, transforming the data, and publishing outputs to the specified destination. A template consists of placeholders for the following flow objects:
Imported dataset
Recipe
Output
To create a working flow, into which you can import data, transform it, and then run a job to generate the desired output, you must specify one of each of the above objects in the template. Details are below.
How to use a template
Follow these steps to use a template.Steps:
From the Home page, select the required template.
Note
If you want to use a blank flow, you can select the Create a new flow option.
A new flow is created, with the
Template Name- X, where:Template Nameis the name of the template you have selectedXis a number.Tip
Click the
Template Name- X, to enter a flow name and description.
Review the guidelines to populate each placeholder in the template. A template has been specified when you have configured one instance of each of the following:
Dataset: Click the Dataset placeholder to select a dataset to import. For more information, see Import Data Page.
Recipe:After you import a dataset, an empty recipe is created for you. To build your recipe, click the recipe placeholder. For more information, see Transformer Page.
Output: Click the output placeholder. Specify the file or table output to which results are written.
Note
In some cases, an output placeholder may not be available in the template. You may need to create the output object.
For more information, see Create Outputs.
The Create Output dialog box is displayed.
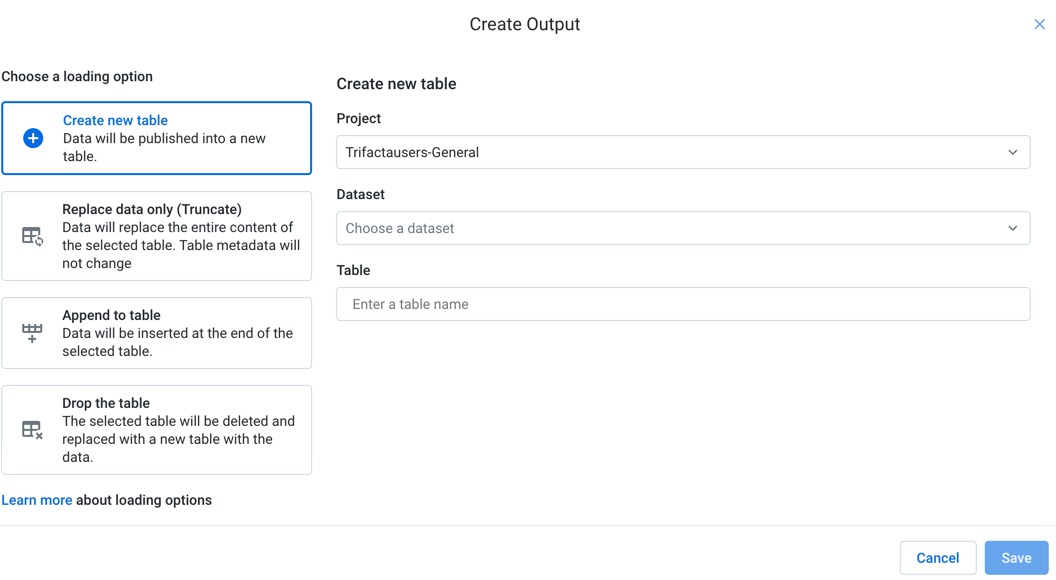
Figure: Create Output dialog
Select the required loading option. For more information, see Loading Options below.
Then, select objects from the available drop-downs to specify the table that you are loading.
To add the output, click Save.
The output is saved in the selected destination.
When finished, the specified objects are displayed in the flow in Flow View.
To run a job, select the output object, and click Run.
Configure the job in the Run Job page. Click Run again.
Loading Options
The following options are available for loading a table:
Create a new table: For each job run, a new table is created with the same base name in the selected publishing destination.
Replace data only (Truncate): For each job run, all data in the table is truncated and replaced with any new results.
Append to table: For each job run, new results are added to the end of the table.
Drop the table: With each run, the table is dropped (deleted). A new table with the same name is created, and any new results are added to it.