Create Connection Window
Note
This feature may not be available in all product editions. For more information on available features, see Compare Editions.
Through the Create Connection window, you can create and edit connections between the Dataprep by Trifacta platform and remote storage.
Note
Access to this page in the application and privileges on its related objects is governed by roles in your workspace. For more information, please contact your workspace administrator.
This window is available from the following locations:
From Import Data page: By default, the window displays connections that support import. Deselect the checkbox to display all available connection types.
From Run Job page: When you add a new connection as part of a publishing action, the window displays connections that support publishing by default.
From the Connections page: All available connections are displayed.
Note
Some connection types may not be available for your environment.
Note
In your environment, creation of connections may be limited to administrators only. For more information, please contact your Alteryx administrator.
Tip
Administrators can edit any public connection.
General Connection Notes:
After you create a connection, you cannot change its connection type. You must delete the connection and start again.
Connections can be created, managed, shared, and deleted through the Connections page. See Connections Page.
Database Connection Notes:
Database connections cannot be deleted if their databases host imported datasets that are in use by the Dataprep by Trifacta platform. Remove these imported datasets before deleting the connection.
Jobs created for datasets sourced from a database cannot be executed on a Spark-based running environment.
Connection Type
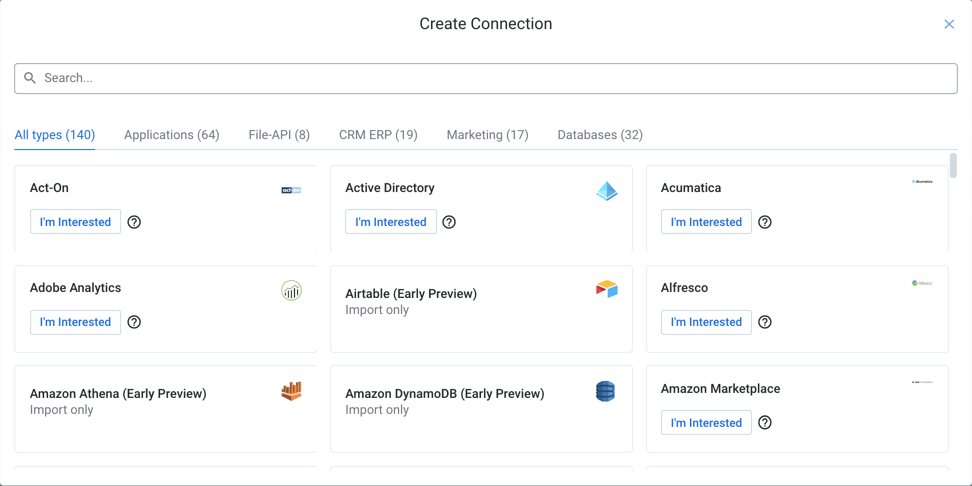
Figure: Connection Type window
In the Connection Type window, you search or browse for the type of connection to create.
Actions:
Use the Search bar to perform real-time searches of connection types.
Click one of the categories to browse for connection types that apply to the listed environment.
Select the type of connection to continue:
Import only- Connection can be used only to import data into the platform.Publish only- Connection can be used only to publish data from the platform to the connection target.Import and publish- Connection can be used to import data and to publish your outputs.
Tip
Early Preview connection types provide read-only access to the designated datastore. These limited-support connection types provide early access so that you can get started using your data. For more information, see Early Preview Connection Types.
Tip
Click I'm interested to upvote adding the connection type to the Trifacta Application. Help chart the future direction of connectivity!
For more information on these connections, See Connection Types.
Create Connection
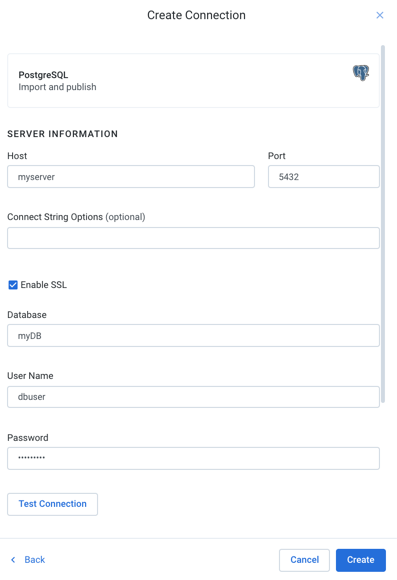
Figure: Create Connection Window
Property | Description |
|---|---|
Host | Host of the database. |
Port | Port by which to access the database host. Default values are pre-populated based on the connection type you selected. |
Connect String Options | (optional) If access to the database requires special connection string options, you may paste or enter them here. You only need to provide the parameter and string value. Example: ";transportMode=http;httpPath=cliservice" |
Enable SSL | To connect using SSL, click this checkbox. If this checkbox is not present, SSL connections for this database type are not supported or are required: No additional Connect String Options are required for supported database vendors. Note The database must be configured to receive SSL connections. |
Service Name | (Oracle only) Name of the service. For example, enter |
Database | (PostgreSQL only) Name of the database to connect. The name of the default database is the username, so you should change this value in most cases. |
Credential Type | Depending on the type of datastore to which you are connecting, you may have multiple methods of providing credentials for authentication:
|
User Name | (basic credential type) Username to access the database. This value is encrypted for security. |
Password | (basic credential type)Password for the specified user. This value is encrypted for security. |
OAuth 2.0 Client | (OAuth 2.0 credential type) Select the OAuth 2.0 client to use to connect to the datastore. Note You must create a separate connection for each OAuth 2.0 client that is available in the drop-down list. |
Test Connection | When the above properties are specified, click Test Connection to validate that the Dataprep by Trifacta platform can connect to the database. |
Advanced Options: Default Column Data Type Inference | You can choose to enable or disable type inferencing for individual connections, when the connection is created or edited. |
Advanced Options: Enable SSH Tunneling | If available, the SSH tunneling options allow you to configure SSH tunneling authentication between the Trifacta Application and your database. Note SSH tunneling is available on a per-connection basis. It may not be available for all connections. For more information, see Configure SSH Tunnel Connectivity. |
Connection Name | Display name of the connection, which appears in the application. Note This value must be unique among all connections. |
Connection Description | User-friendly description for the connection, which appears in the application. |
When you've finished, click Ok to save the connection.
After you have created your connection, run a simple job on data sourced from it.
Note
You can make the connection available to all users by sharing it. See Connections Page.