Invite New Users
Organizational Admins can invite new users to Auto Insights from the Admin Portal. Any user can invite new users by sharing a Mission or the Invite new user button on the Users page. This article describes how to invite users and manage invitation methods as an Org Admin.
Check if You're an Organization Admin
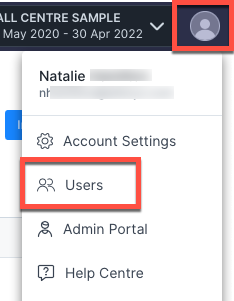
If you're an Organization Admin, the Admin Portal link displays below Account Settings. If you don't know what access level you have, select the profile icon in the upper-right corner again once the Admin Portal has loaded. Your access permissions are listed next to your name.
Invite via Admin Portal
Only Organization Admins can invite new users using the Admin Portal.
To create a user via the Admin Portal...
Select your profile icon in the upper-right corner of the Auto Insights page, then select Admin Portal.
Select the Users tab from the menu bar.
Select Create New User.
Enter the first name, last name, and email address of the new user.
Select Save.
Auto Insights sends the user a welcome email with sign-in instructions. If the user doesn't receive the email, you can select Resend Invite to resend the email.
Find the new user in the users' list. Enter the details, including First and Last Name, Job Title, Department, and User Type.
Select Save.
In the Role section, assign a role and select Assign. Learn more about roles in the Administrator Guide.
To invite a new user with a Signup link...
Select your profile icon in the upper-right corner of the Auto Insights page, then select Admin Portal.
Select the User Access tab from the menu bar.
Select Open.
Select Copy link.
Share the link. The user you invite can then set up their account. The system automatically assigns the role User. Learn more about roles in the Roles article.
Non-Admin Invite Options
There are 2 ways to allow non-admin users to invite new users. The invite options are Moderated or Open. To select one of the invite options, go to Admin Portal > User Access. You can change this setting anytime, but you have to clear pending invitations first.
Moderated
The Moderated option allows any user to invite new users via share Missions and the Invite new user button on the Users page. Your approval is required. To turn on this option...
Go to Admin Portal > User Access.
Select Moderated.
You'll see a notification on your profile icon anytime a new user is invited. To accept or reject the new user's access...
Select your profile icon, then select Users.
From the Pending tab, select Accept to send an email invitation to the new user and a confirmation email to the requestor. Or, select Reject to delete the user and notify the requestor by email.
Open
The open invitation option allows any user to invite new users via share Missions, and the Invite new user button on the Users page. The invited user can sign up without your approval. To turn on this option...
Go to Admin Portal > User Access.
Select Open.
Enter the email domains you want to allow and select Save.
You'll receive an email notification each time a new user is invited. You don't have to act for the user to create an account. The system automatically assigns the role of User upon account creation. If you don't want the invited user to create an account, you can revoke the invitation. To do so, go to Admin Portal > Users.
Inviting SSO Users
For all invite options: If using SSO, new users must be in the correct Active Directory group to create an account and sign in to Auto Insights.
Assign New Users Access to a Dataset
You can assign users access to a dataset and set their permission level to the dataset on the Users page.
In the Groups section, select + Assign to a group.
Select the group to give access to and select Assign.
Frequently Asked Questions
How can I, as the Organization Admin, identify users who have received an invite?
Auto Insights displays a "pending" label next to the invited user's name before they have signed in for the first time. You can see this label in the Admin Portal next to the user's name as well as throughout the product.
When does the "pending" label disappear?
Once a user signs into Auto Insights for the first time, the account becomes active.
How long is an invite valid?
The invite link expires after 7 days.
Can I resend an invite link?
Yes, you can resend the link and restart the 7-day countdown.