How to Connect to a Database
注意
This article is relevant only to datasets created via the Auto Insights Admin Portal.
For a streamlined data import experience, including support for 70+ database connections, we recommend Import Data from Alteryx One Platform.
Before reading this article, please make sure you have read the general steps on how to upload data, available here.
Direct Database Connection
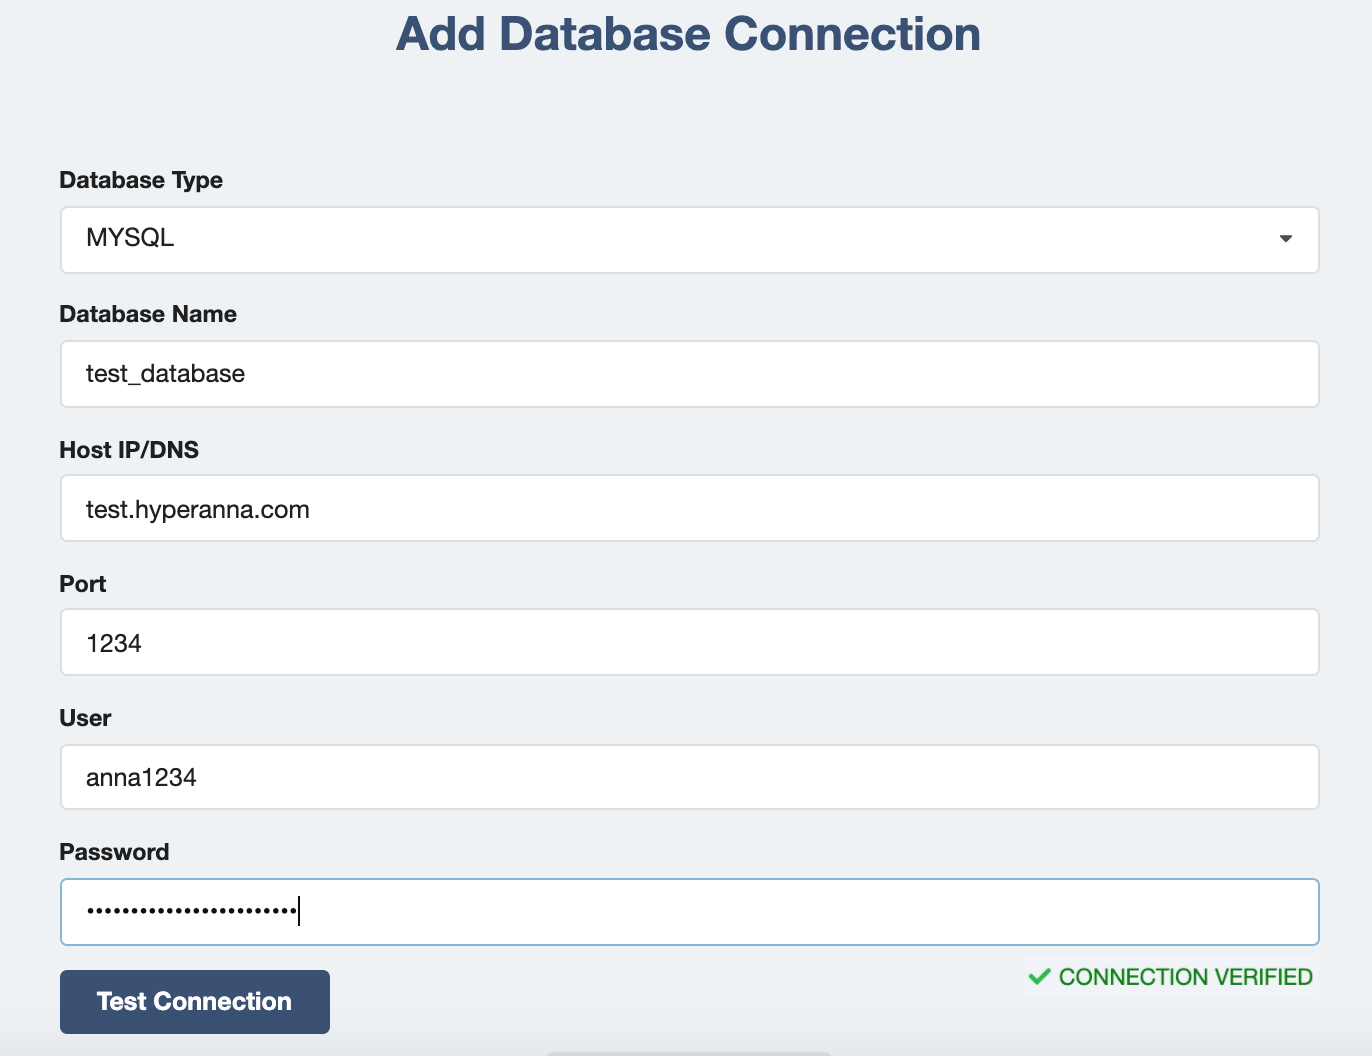
1. Using the Database Type dropdown, select your database type and complete the necessary details. Click Test Connection once you have completed the relevant details. If successful, Connection Verified will appear in the bottom right of your screen.
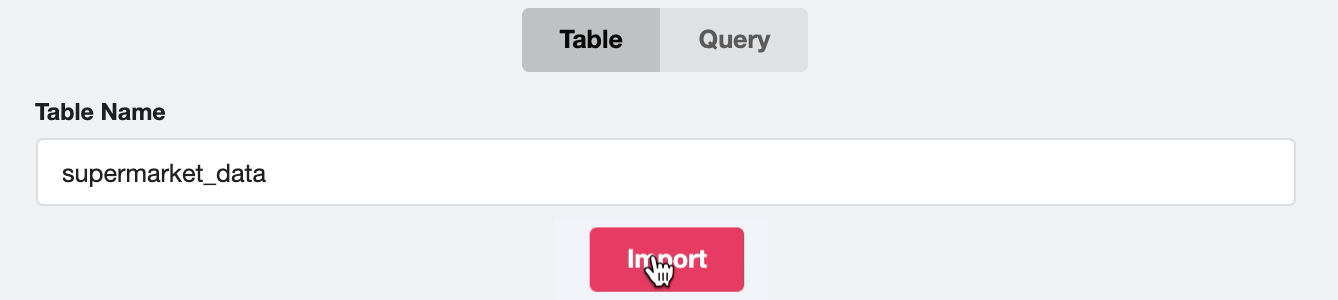
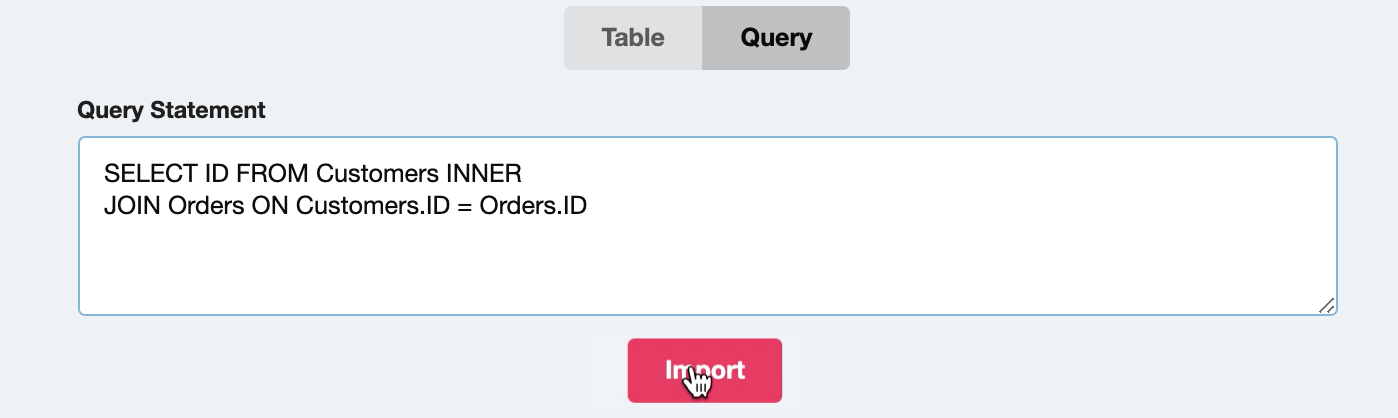
2. Under Test Connection, you can choose a table in your database or write a query statement to define what data is imported into Auto Insights.
We recommend that your query statements be less than 64,000 characters. Reach out to us at https://community.alteryx.com/support if you need assistance with longer queries.
This is how you can merge different datasets in Auto Insights or include logic currently used in your reporting.
Snowflake connector specific: By default, the table/query statement will be converted to uppercase when Auto Insights reads it. If your table name is in mix/lowercase, i.e., TableName or tablename, Auto Insights will read it as TABLENAME. To handle this, you will need to surround the table name in "", e.g,. "TableName" for Auto Insights to identify the correct Snowflake table.
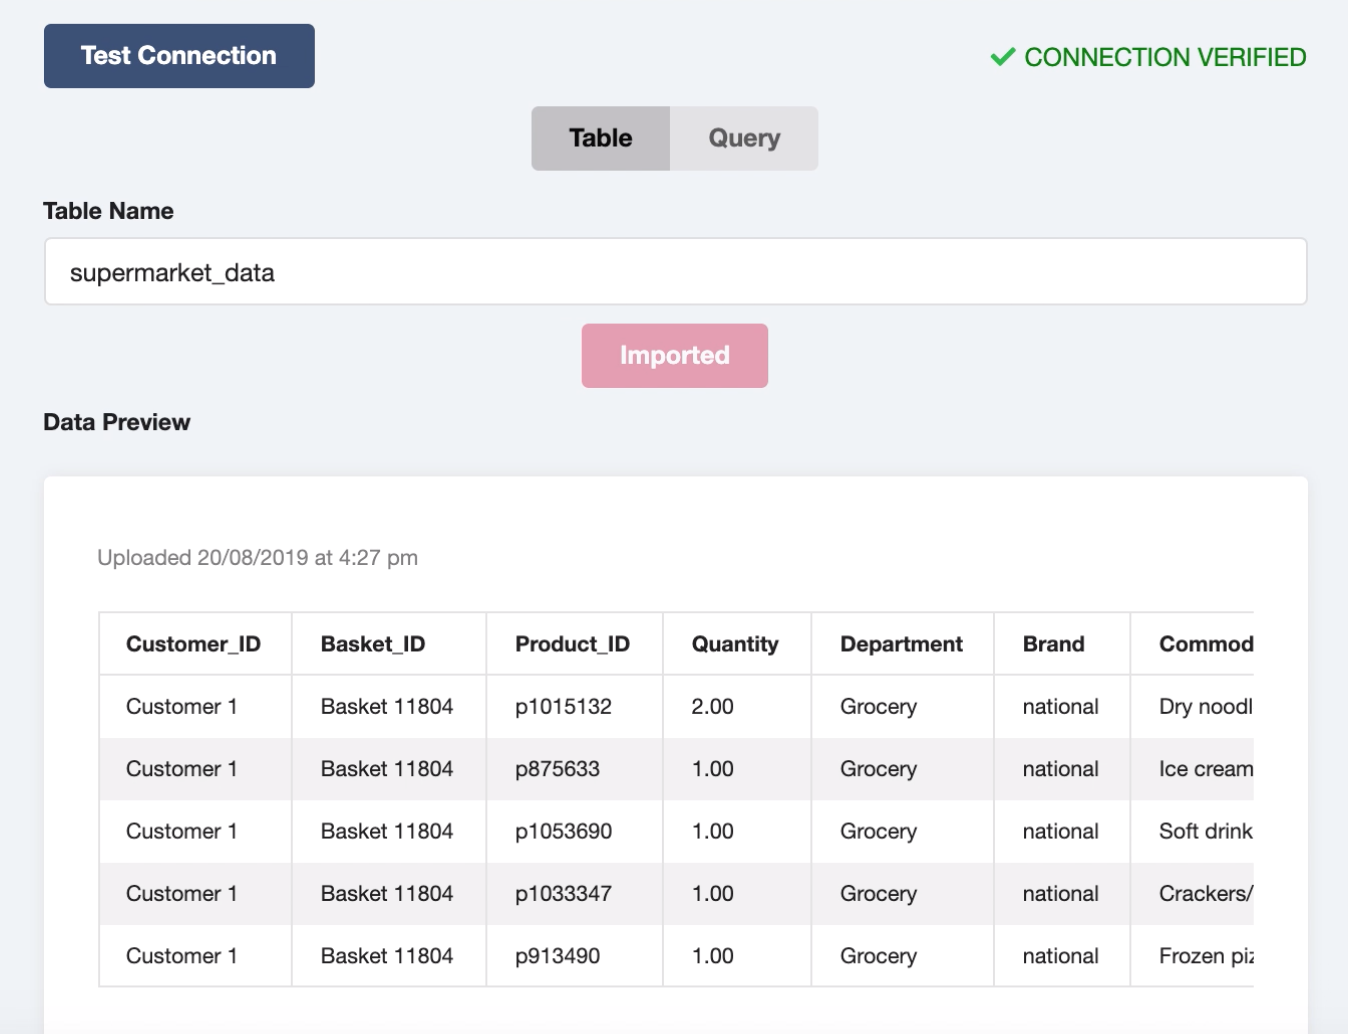
3. Auto Insights will provide a preview of your data so you can validate that what you have connected is correct before pressing Analyse.
4. If you are happy with the preview, press Analyze, at which point Auto Insights will begin analyzing your data. As part of this process, Auto Insights will identify key attributes, such as:
Dates
Measures
Segments
Auto Insights will also understand how the attributes should be treated and interpreted. For example, Auto Insights will automatically identify that it’s good when revenue increases and that you can aggregate the totals over time. Auto Insights also flags data quality issues that could impact the insights; for example, columns that have lots of missing data.
5. Finally, Auto Insights will ask you to confirm your column fields are correct. If you want to change or update any selections, it’s quick and easy. You can update column headings or simply toggle off columns you don't want to show in Auto Insights.

6. Once you have completed your review, click Upload to Auto Insights , and that's it! Auto Insights will automatically generate insights, meaning there's no need to start from scratch building dashboards, views, or visualizations. All of that is taken care of for you by Auto Insights, so you can get straight to discovering insights and making data-driven decisions.