使用 Microsoft Entra ID 配置 Alteryx Server 以支持 SCIM
本文档为希望使用跨域身份管理系统 (SCIM) 将 Alteryx Server 与 Microsoft Entra ID 集成的管理员提供说明。通过本指南可了解如何在 Server 中启用 SCIM、配置 Microsoft Entra ID 以连接到 Server 进行 SCIM 预配,以及如何在 Microsoft Entra ID 中预配用户和组。通过此集成,您可以简化用户和组管理,确保 Alteryx Server 与 Microsoft Entra ID 之间实现同步,获得无障碍体验。
注意
此配置要求 Microsoft Entra ID 能够通过 HTTPS (SSL/TLS) 连接与 Alteryx Server 通信。请与您的网络和安全团队核实,确保网络、防火墙和路由已正确配置以允许此通信。为了支持此通信,必须为 Alteryx Server 启用 TLS。如需详细了解 TLS,请参阅配置 Server SSL/TLS。
启用 SCIM 支持
SCIM 要求将 Alteryx Server 配置为支持 SAML 单点登录。
对于新环境,请按照配置 Alteryx Server 身份验证中概述的步骤来设置 SAML。
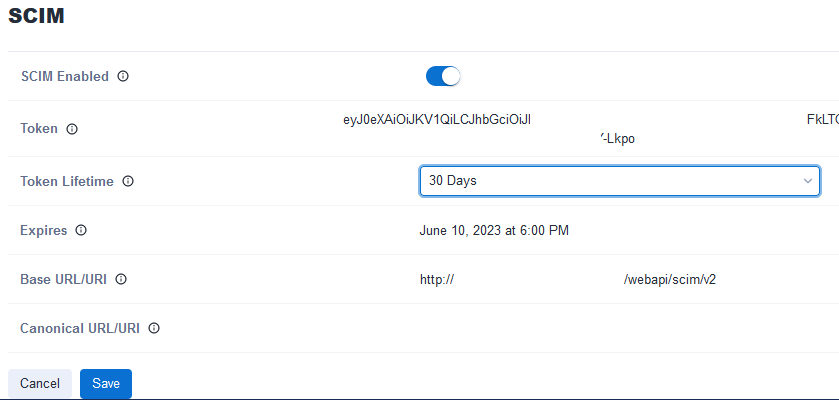
以管理员(Server 管理员)身份登录到 Alteryx Server,然后导航到管理员 > 设置 > 配置 > SCIM。
选择编辑。
打开开关以启用 SCIM。
根据您的需要选择令牌生命周期。请咨询贵公司的安全团队以获得指导。
选择保存。
记下基 URI 和令牌,因为在 Microsoft Entra ID 中配置连接时需要使用这些信息。
配置 Microsoft Entra ID
登录到 Microsoft Entra ID。
如果您尚未为 Alteryx Server 创建应用程序,请选择 Enterprise applications(企业应用程序)。
选择 +新建应用程序。
选择 +Create your own application(+创建您自己的应用程序)。
在右侧面板中,输入应用程序的名称,例如 Alteryx Server。
选择 Integrate any other application you don’t find in the gallery (Non-gallery)(集成您在库(非库)中找不到的任何其他应用程序)。
选择创建。
创建应用程序后,选择单点登录并针对 SAML 配置应用程序。如需了解详情,请参阅在 Alteryx Server 上为 Microsoft Entra ID 配置 SAML 2.0。
为 Alteryx Server 创建应用程序后,导航至该应用程序。
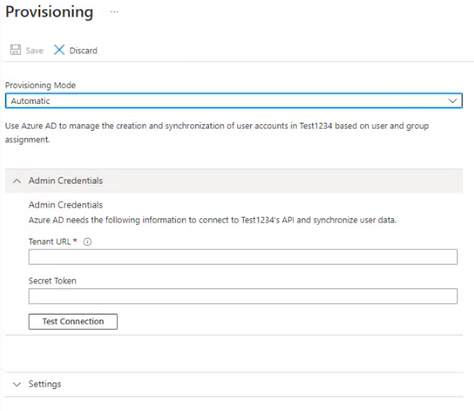
选择 Provisioning(预配)。
对于 Provisioning Mode(预配模式),选择 Automatic(自动)。
对于 Tenant URL(租户 URL),输入您在启用 SCIM 支持部分中记下的基 URI(例如,
https://host.domain.tld/webapi/scim/v2)。对于 Secret Token(密码令牌),输入在启用 SCIM 支持部分中记录的令牌。
选择测试连接以确认 Microsoft Entra ID 可以连接到 Alteryx Server。
如果连接测试失败:
注意
虽然 SAML 登录默认情况下可能正常运行(因为这涉及用户从内部到公共的通信),但这并不意味着您的 Microsoft Entra ID 实例与 Alteryx Server 实例之间有直接通信路径(这要求 Microsoft Entra ID 的公有云与专用网络之间能成功通信),而该路径是 SCIM 正常运行的必要条件。
如果您收到错误“发送请求时出现错误。”,请查看以下选项以确保这些系统之间的通信正常。
确保您输入了正确的 URL 和令牌。
请咨询您的网络团队和安全团队,确保允许 Alteryx Server 与 Microsoft Entra ID 之间的网络连接。
如果您无法允许 Microsoft Entra ID 直接连接到 Alteryx Server,或许可以使用 Microsoft Entra ID 的预配代理,而非此配置。如需了解详情,请咨询 Microsoft Entra ID 管理员,并查看针对启用 SCIM 的应用程序进行 Microsoft Entra 本地部署应用程序预配的相关内容。
预配用户和用户组
登录到 Microsoft Entra ID。
导航到您在配置 Microsoft Entra ID 部分中为 Alteryx Server 创建的应用程序。
选择用户和用户组。
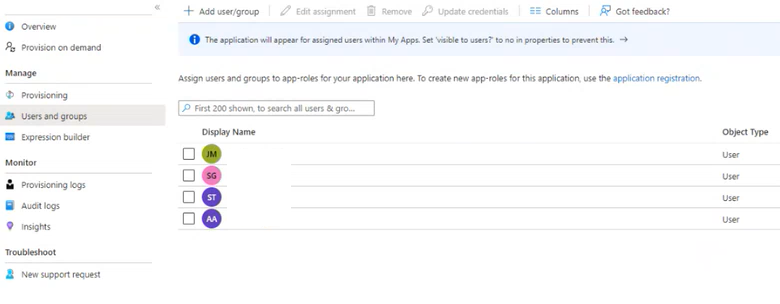
单击 +添加用户/用户组。
在右侧面板中,使用搜索功能查找并选择要添加的用户和用户组。
所选的用户和用户组将显示在面板的下半部分。
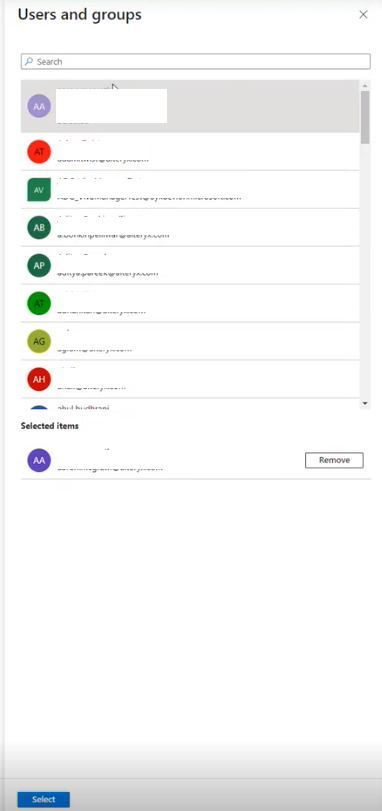
要结束选择,请选择面板底部的选择按钮。
这将返回到用户和用户组页面,其中包含与该应用程序关联的用户和用户组的列表。
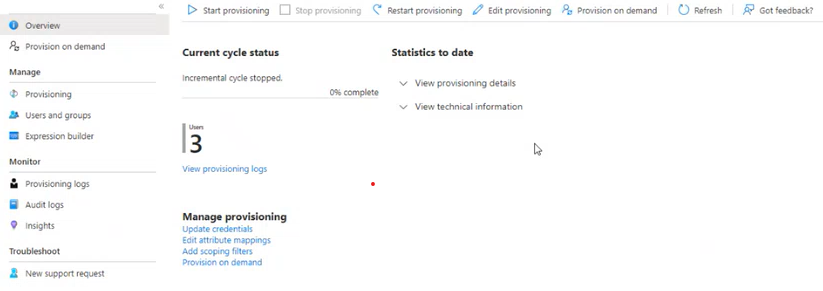
选择 Provisioning(预配)。
选择 Start provisioning(启动预配)以启用预配。这将启动增量预配周期,Microsoft Entra ID 会在该周期中与 Alteryx Server 同步用户和组。此同步完成后,Microsoft Entra ID 中对用户或组所做的任何更改都将反映在 Server 中。Microsoft Entra ID 同步更改最多可能需要 40 分钟。
Alteryx Server 中的预配过程会根据分配给 SCIM 应用程序的用户和组生成以下结果:
用户:使用默认角色创建。
Alteryx 自定义组:为每个 Active Directory 组创建,并分配默认角色。
用户分配:根据用户的 Active Directory 组成员身份,将用户添加到各自的自定义组中。
确认同步成功
请至少等待 40 分钟,确保 Microsoft Entra ID 完成预配周期。
以管理员(Server 管理员)身份登录 Alteryx Server。
导航至管理员 > 用户。
确认在 Microsoft Entra ID 中预配的用户和组已在 Server 中成功创建或更新。
注意
如果用户或用户组最初未在 Server UI 中显示,请在 Azure 中重新启动预配周期,然后在浏览器中重新加载 Server UI。